Introduction
This document describes the enterprise usage on the HUB portal. The features discribed in this document can be activated using an enterprise license.
The enterprise is mainly used to manage and monitor large amount of devices in the HUB and allow custom HUB layouts for namespaces owned by enterprises.
About this manual
Callouts
Used for notes in this documentation
Used for warnings in this documentation
Used for important notes in this documentation
Used for tips in this documentation
Used for caution notes in this documentation
Enterprise
The enterprise feature allows users to upgrade a standard namespace to an enterprise variant, offering advanced functionality to manage multiple namespaces within this enterprise. By inviting namespaces to join, enterprises enable them to gain access to manage the namespace at an enterprise level, eliminating the need for end-users to set up their namespace and providing both a simpler user experience and improved enterprise management capabilities.
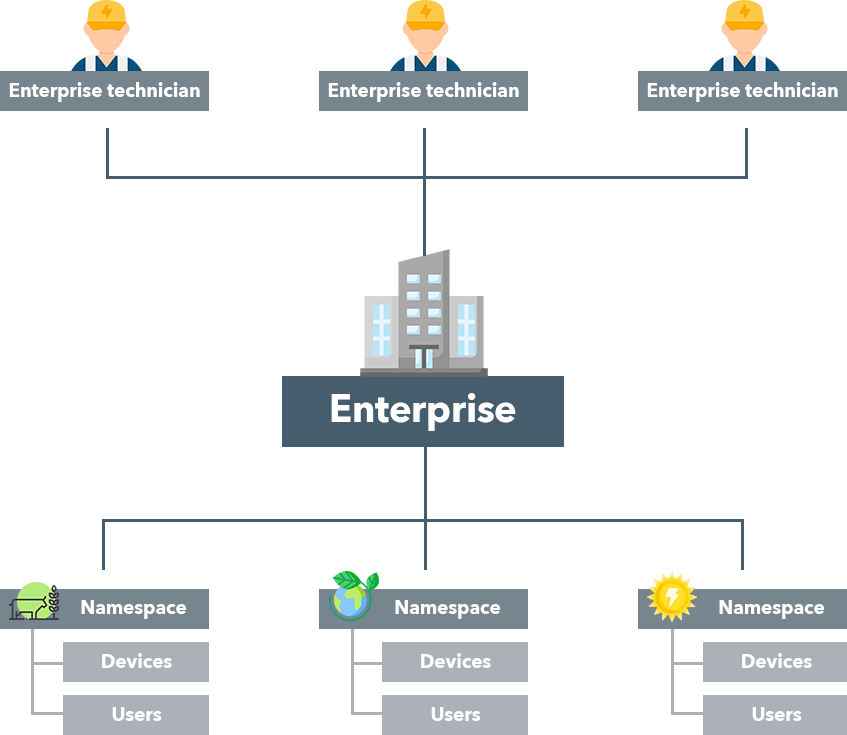
Enterprises have the feature to create custom themes, enhancing the visual experience for users across namespaces within the enterprise. These themes can be crafted using company colors and logo’s, ensuring a consistent organizational look across all namespaces linked to the enterprise.
Enterprise management
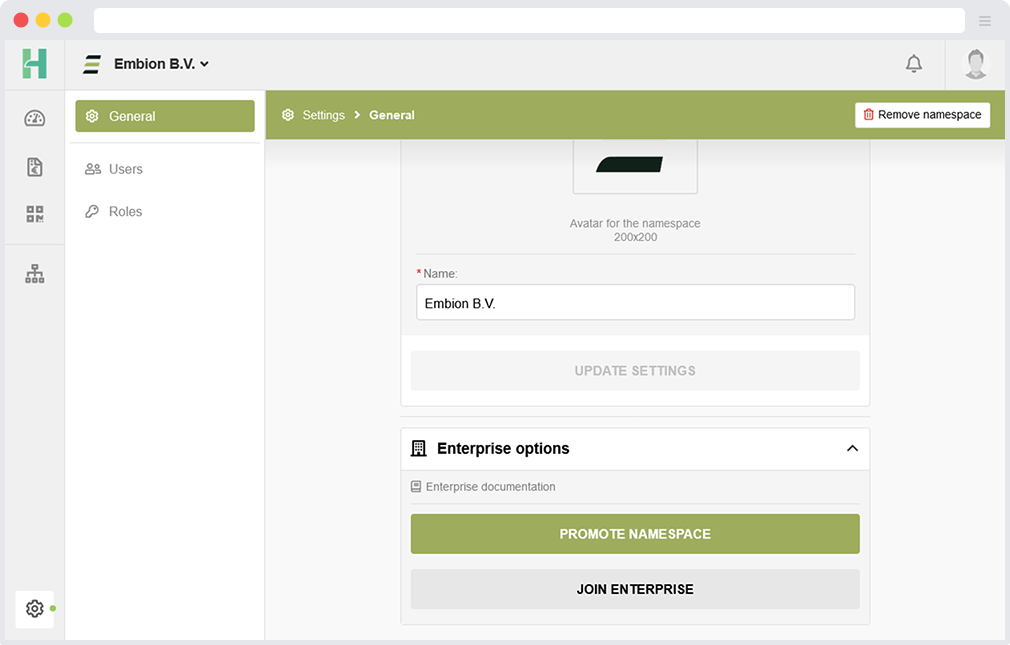
To create a new enterprise, navigate to the namespace settings where enterprise options can be found. Within the enterprise options, a button to promote the namespace to an enterprise can be found. This same location serves as the point of access for namespace users who wants to submit a join request for an existing enterprise.

Create enterprise
To upgrade a namespace to enterprise, you’ll need a valid license code and CCV code. If the license is valid and not expired or already used, the upgrade will be successful. Licenses can be bought from authorized resellers.
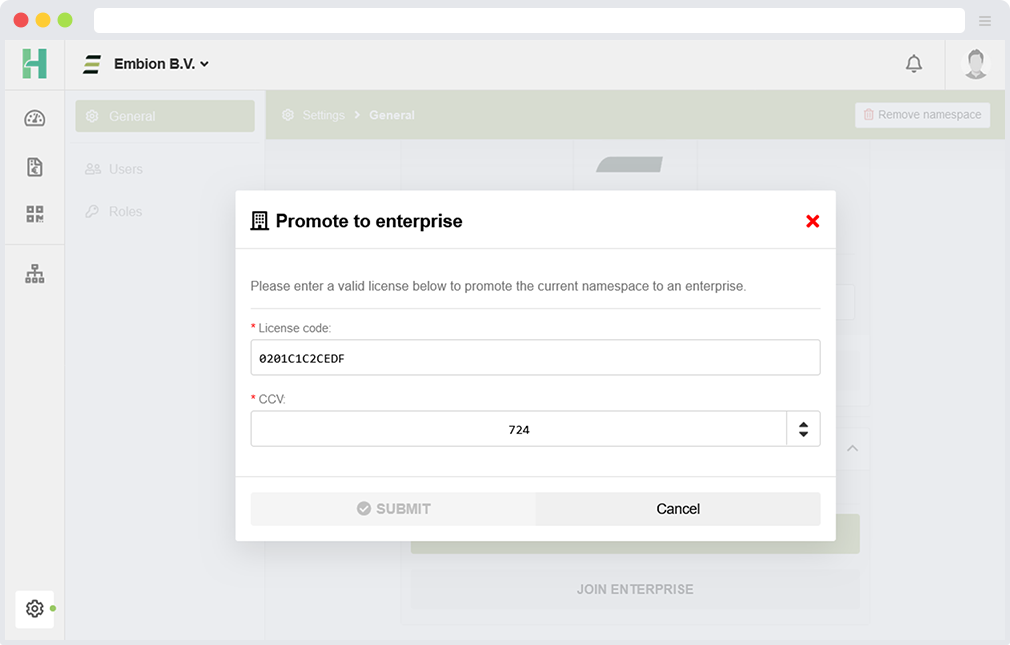
A license can only promote a namespace to enterprise once. When the enterprise is removed, it cannot be promoted again with the same license.
Before promoting a namespace to an enterprise, ensure that it does not contain any linked devices. If so, please disconnect them before proceeding with the promotion.
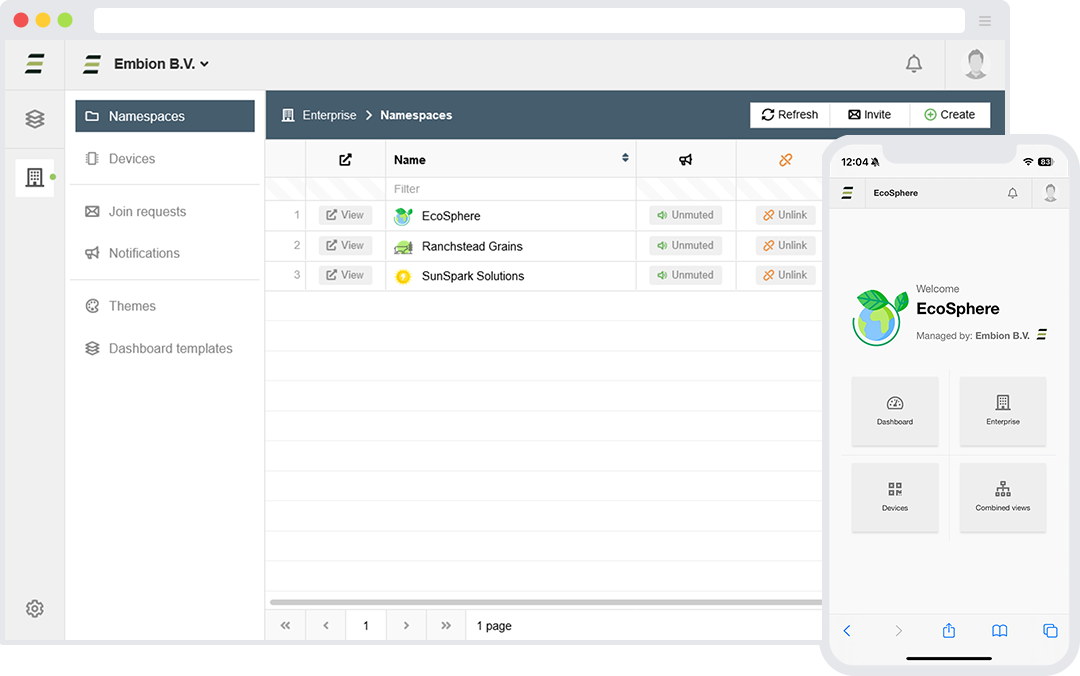
After a namespace is promoted to an enterprise, the enterprise will now be displayed within the namespace selector. Users can open the enterprise by pressing the ‘open’ symbol.
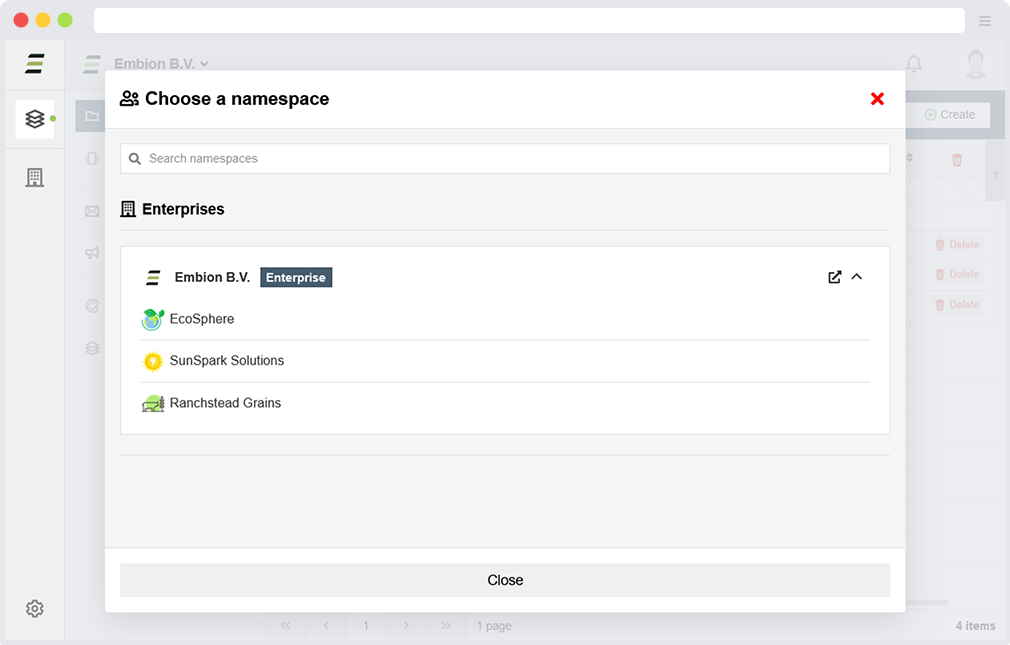
Connected namespaces are listed under the enterprise and can be toggled open or closed to hide them. From here, users can navigate to the connected namespace by pressing them.
When enterprise users visit a namespace connected to the enterprise, their role within the enterprise determines their role within the connected namespace.
Enterprise details
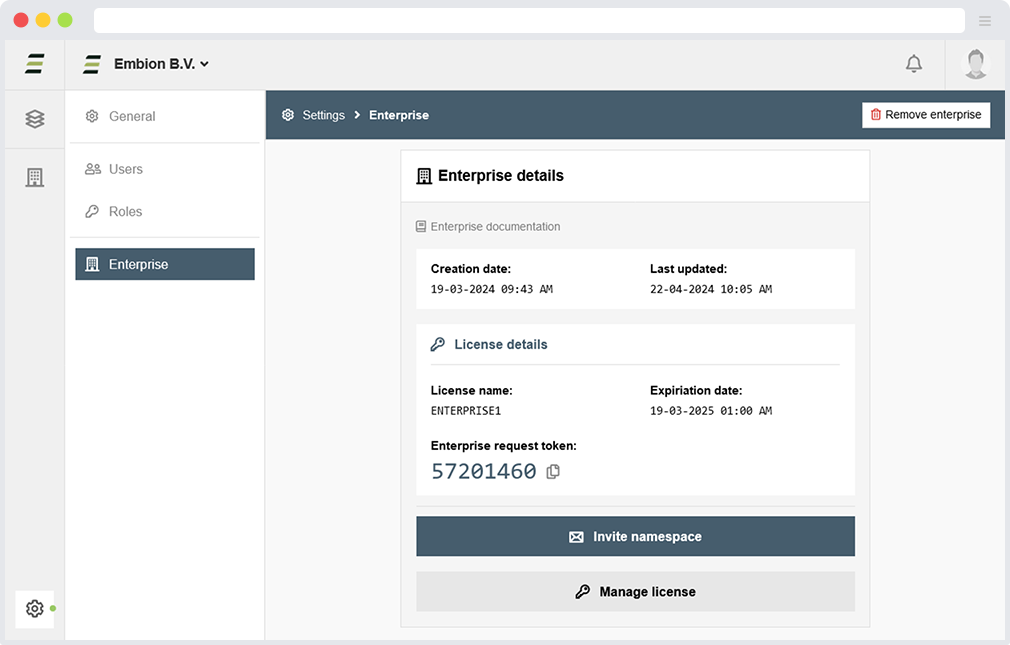
After a namespace is promoted to an enterprise, a new ‘Enterprise’ page is added to the settings application. Here, users can find details of the active license and manage it as needed. Additionally, the enterprise token, which can be provided to users to create a join request with their namespace for the enterprise, can be found here.
Remove enterprise
Removing the enterprise will change it back to a regular namespace and lose the ability to manage connected namespaces. All users will keep their roles within the namespace.
Removing the enterprise is only possible if there is at least one administrator in all of the connected namespaces. If not, an administrator must be assigned before proceeding with the removal.
Enterprise features
When a namespace becomes an enterprise, users within the enterprise gain access to the enterprise application, where they can use all available enterprise features.
The enterprise application is only visible for users when inside an enterprise they member of or a connected namespace within this enterprise.
Namespaces
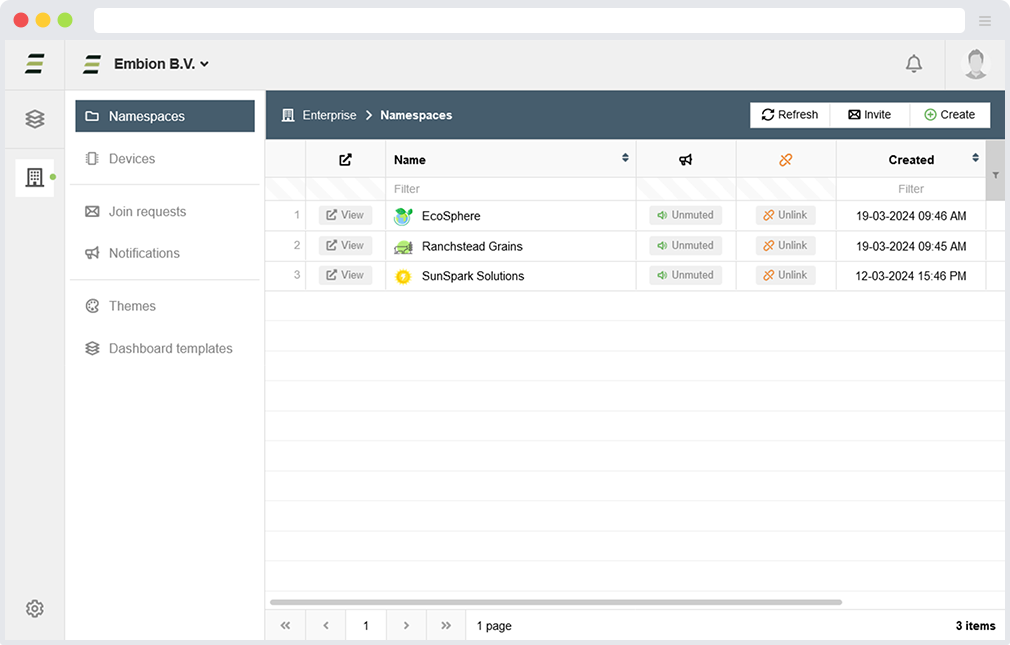
On the namespaces page, it is possible to manage all connected namespaces. It possible to create new namespaces which are directly linked to the enterprise, allowing to set them up before inviting end-users.
Invite namespaces
For enterprise users, adding existing namespaces to the enterprise isn’t directly possible. Instead, a user within the namespace must create a join request. To do this, they need a token, which can be found by pressing the invite button on the namespace overview or within the enterprise details in the settings application.
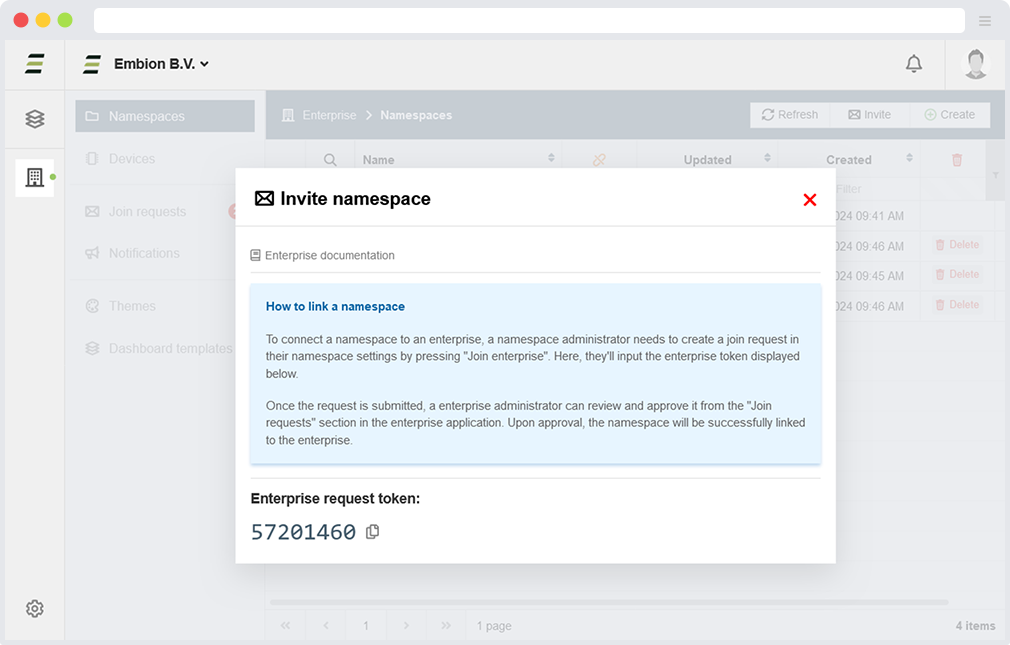
When a namespace creates a join request, enterprise users will receive a notification within the HUB. Upon acceptance or rejection, namespace users will receive a notification informing them of the status of their request.
When users require further information on joining the enterprise, documentation is accessible here.
Unlink namespaces
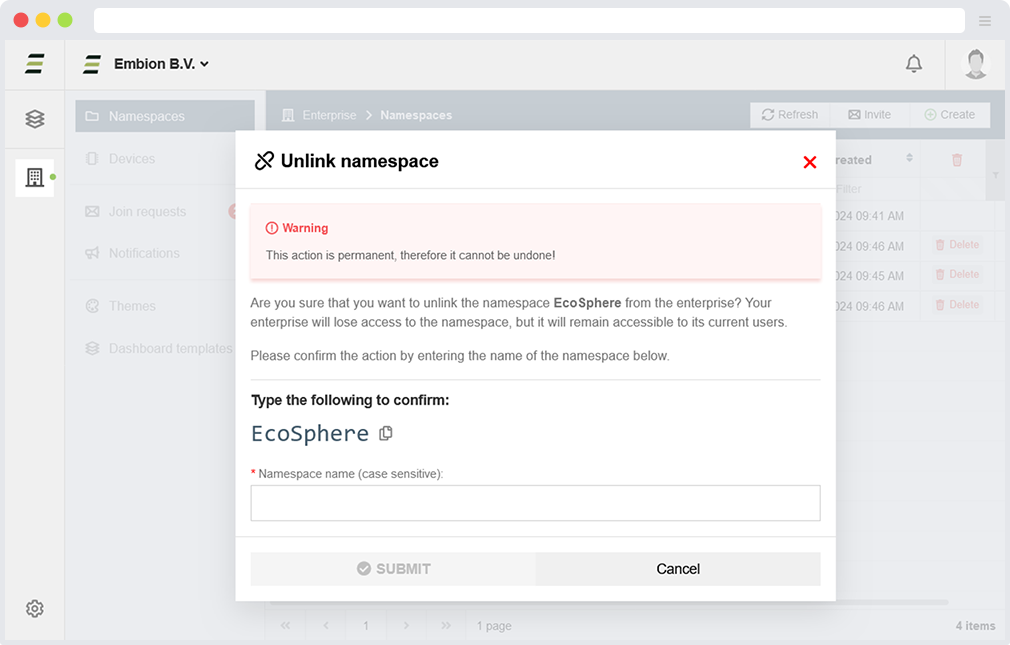
It’s possible to unlink a namespace from the enterprise, which results in losing access to manage it. However, the namespace will continue to exist with its current users.
Unlinking the namespace is only possible if there is at least one administrator within the connected namespace. If not, an administrator must be assigned before unlinking the namespace.
Visit namespaces
In the namespace overview, it is possible to access the listed namespaces by clicking on the row or the “show” button. When enterprise users visit a namespace, their role within the enterprise determines their role within the namespace.
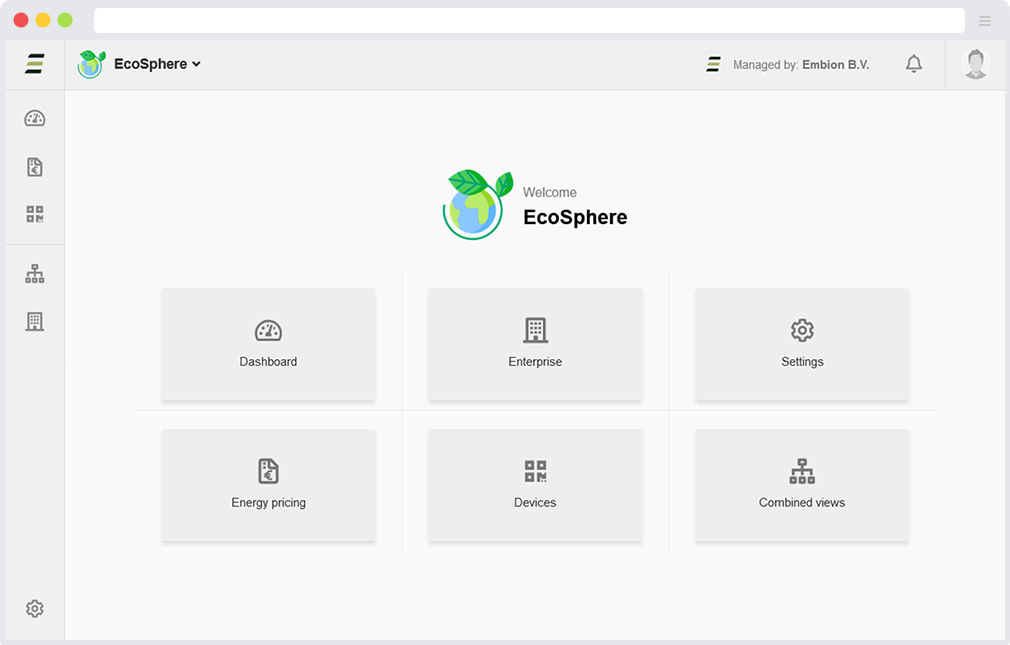
When enterprise users visit a namespace connected to the enterprise, their role within the enterprise determines their role within the connected namespace.
Switch namespaces
When a user is a member of an enterprise, enterprises will appear within the namespace selector. This allows enterprise users to easily switch between namespaces they have access to, without needing to open the enterprise application.
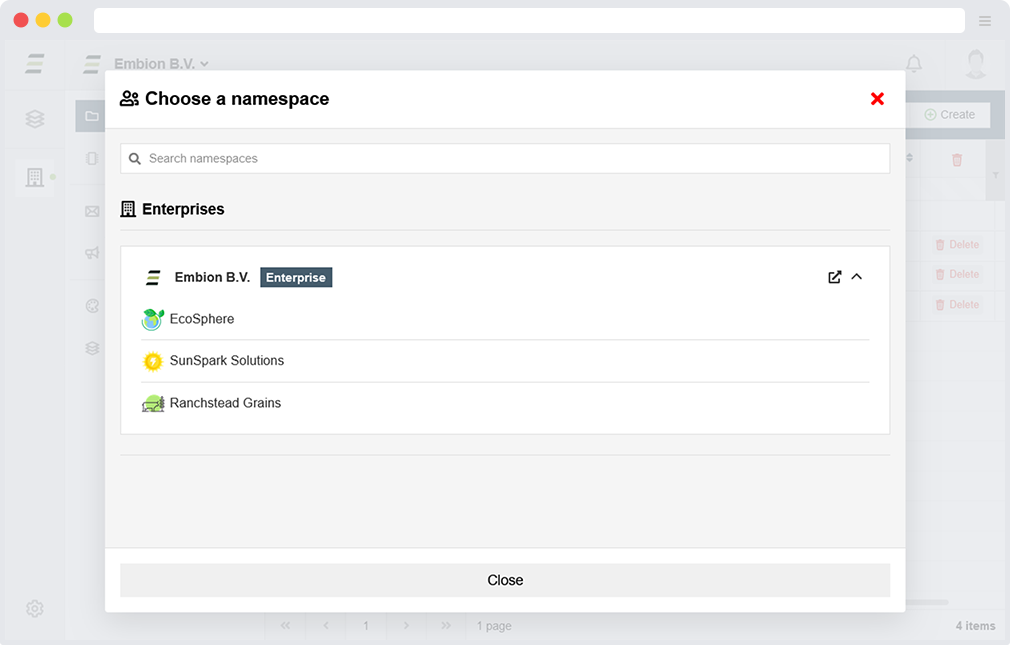
When enterprise users visit a namespace connected to the enterprise, their role within the enterprise determines their role within the connected namespace.
Devices
On the devices page, users can view all connected devices within namespaces linked to the enterprise. Various information about the devices will be displayed here.
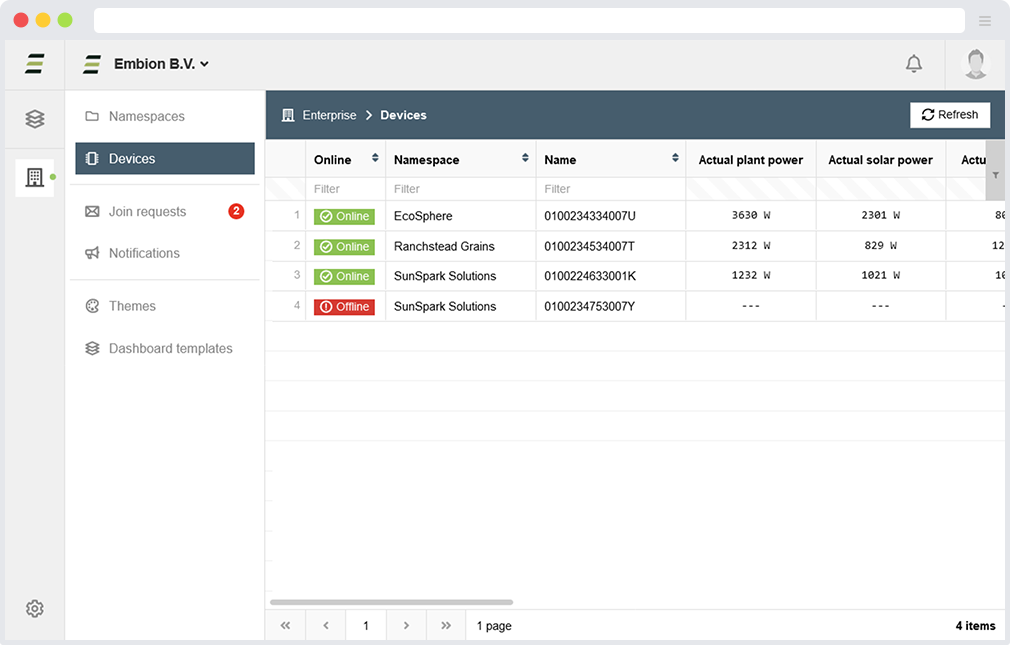
The following details can be read from the devices:
- Online / offline status
- Name of the device
- Namespace where the device is registered in
- Actual plant, solar and grid power
- Run status, error and warning amount
- Plant control status
- Status message
- Device software status
- Product and serial number
- Dates of last data and status calls
Join requests
When a namespace wants to join the enterprise and has created a join request, those requests are listed here, giving the enterprise the ability to accept or reject them.
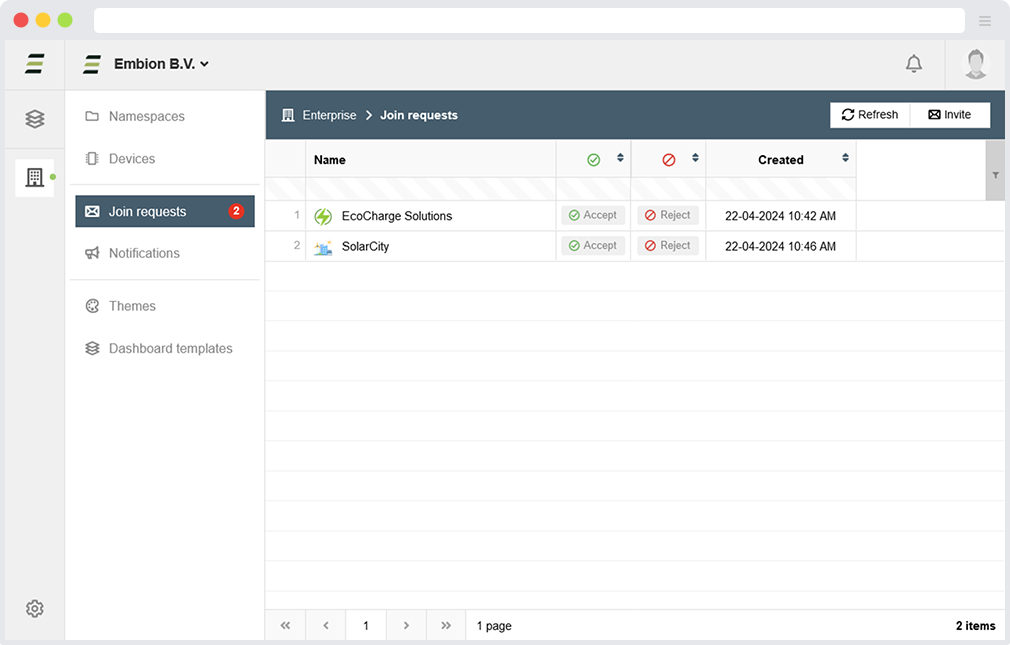
When a namespace creates a join request, enterprise users will receive a notification within the HUB. Upon acceptance or rejection, namespace users will receive a notification informing them of the status of their request.
Notifications
As an enterprise, it is possible to receive notifications from managed namespaces. This means when, for example, a device goes offline or a pricing scheme expires in a namespace managed by the enterprise, the enterprise users can receive these notifications based on their personal and enterprise notification settings. Additionally, an entire namespace within the enterprise can be completely muted if preferred, which can be done within the namespace overview.
Notification preferences for each user can be changed by selecting the user and adjusting the settings.
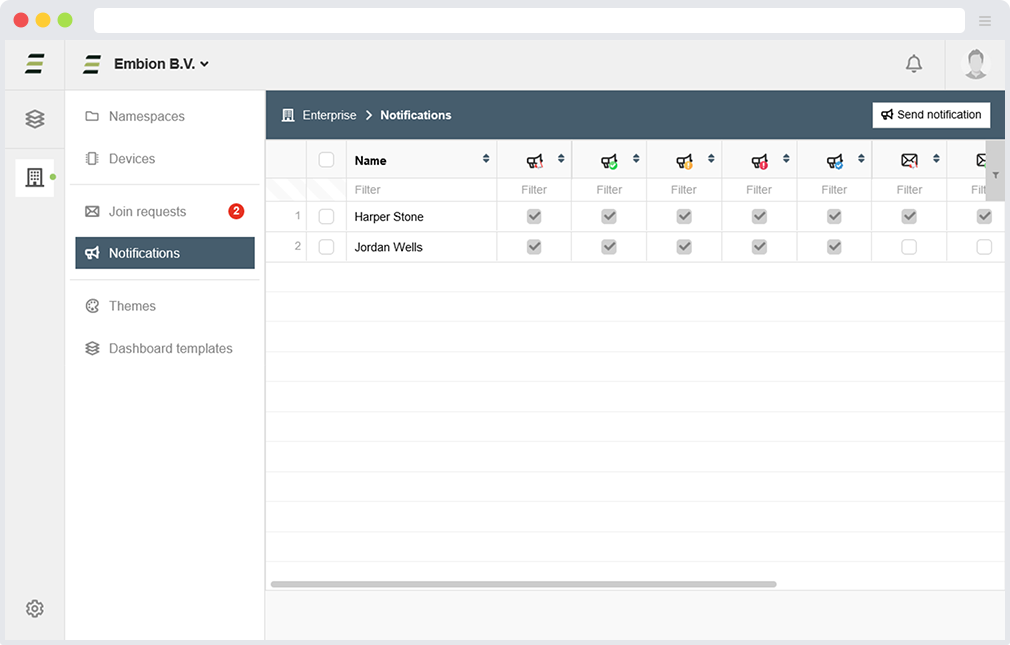
Namespaces within the enterprise can be completely muted if preferred, which can be done within the namespace overview.
Settings
Enterprises can manage notification settings for each user. Administrators can customize which types of notifications users receive and decide which notifications will (also) send an email.
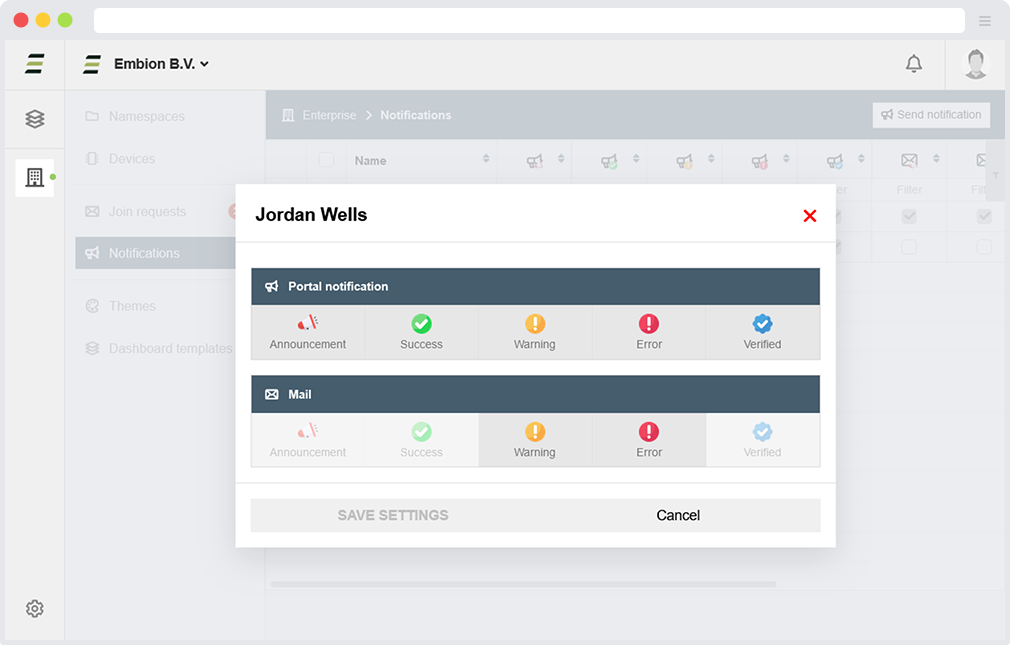
These settings do not override personal account settings. For example, if a user disables warnings in their personal account settings, they will not receive any warnings notifications, even if the enterprise settings enable them.
Custom notification
Enterprises have the ability to send custom notifications to all or selected namespaces they manage. They can choose the type of notification and decide whether it will be sent to all users or only to namespace administrators.
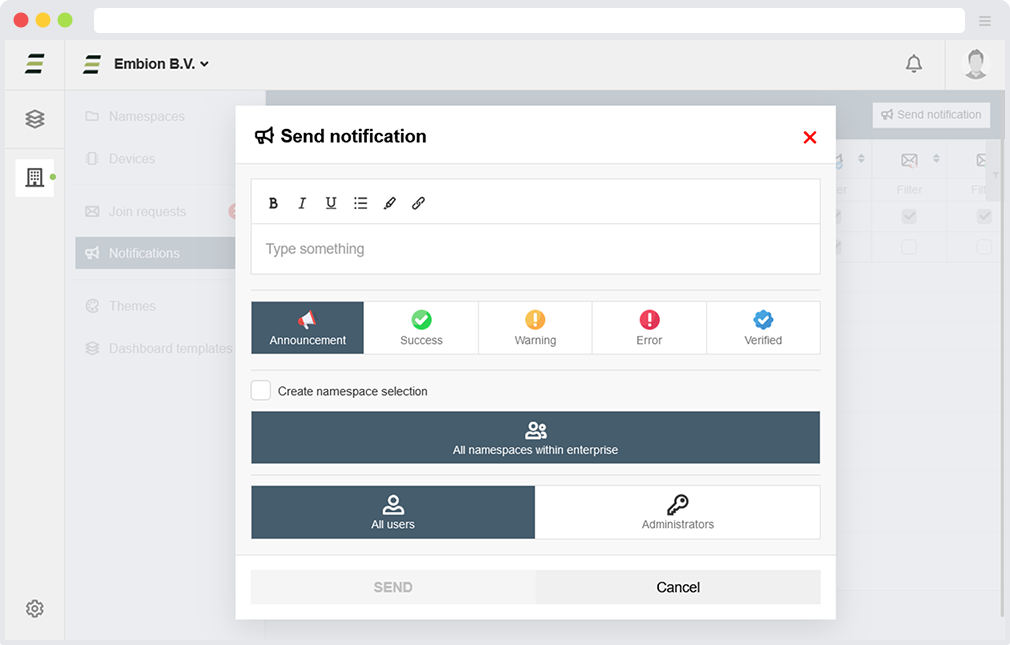
Text within custom notifications can be styled within the input field and links can be created.
Themes
Enterprises have the feature to create custom themes, enhancing the visual experience for users across namespaces within the enterprise. These themes can be crafted using company colors and logo’s, ensuring a consistent organizational look across all namespaces linked to the enterprise.
When a new namespace is created or linked to the enterprise, the default theme is automatically set for the users within the namespace.
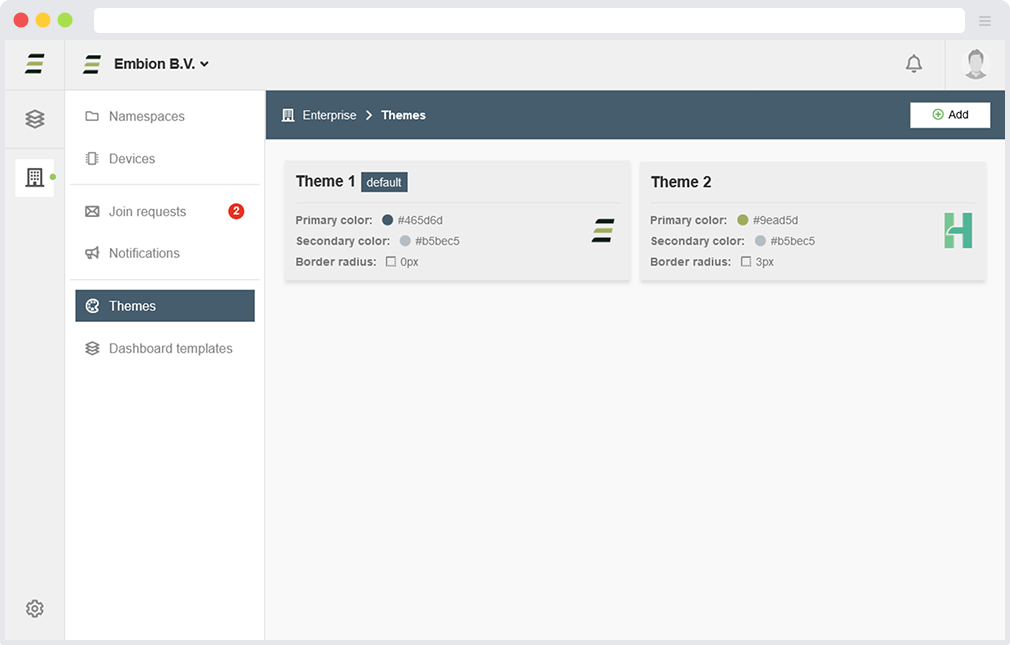
Multiple themes can be created, allowing users within connected namespaces to choose one based on their preferences.
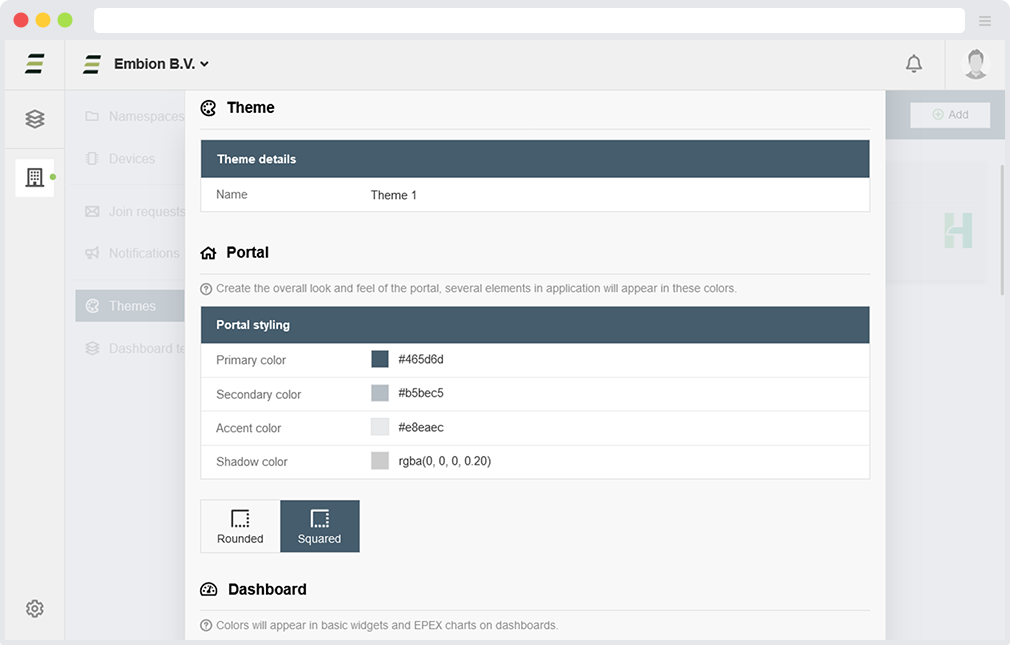
Portal style
When creating a theme, several colors can be changed to change the overal look accross the HUB platform. For now these colors and settings can be defined within the portal section of the theme.
- Primary color - Used in the header, badges, and titles throughout the portal
- Secondary color - Used as background on pages and element throughout the portal
- Accent color - Used as background within several elements throughout the portal
- Shadow color - Used as shadow on several element throughout the portal
- Border radius Change the border radius of element throughout the portal
When defining a theme, HEX, RGB, and RGBA colors are supported.
Graph colors
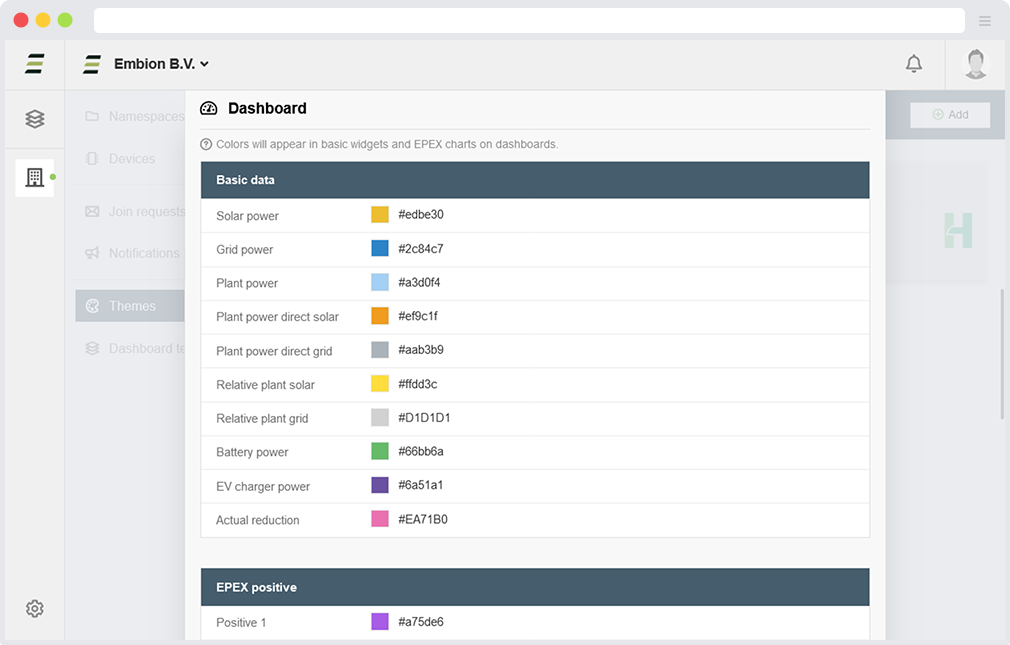
Custom graph colors can also be defined when creating a theme.
Basic data
Colors for the following data within basic widgets on dashboards can be set:
- Solar power
- Grid power
- Plant power
- Plant power direct solar
- Plant power direct grid
- Relative plant solar
- Relative plant grid
- Battery power
- EV charger power
- Actual reduction
EPEX data
Colors for the data within EPEX widgets on dashboards can be set. There are four sets, where positive 1 corresponds to negative 1, and so forth.
- EPEX positive (1-4)
- EPEX negative (1-4)
Advanced data
Colors for data within Advanced widgets on dashboard can be set. There is a total of ten colors that can be defined. Advanted widgets will use these colors based on how many graphs get drawn. For example: A advanced widget with four data sets will use the first four colors defined here.
Example
Example of a dashboard with the use of custom colors defined in a theme.
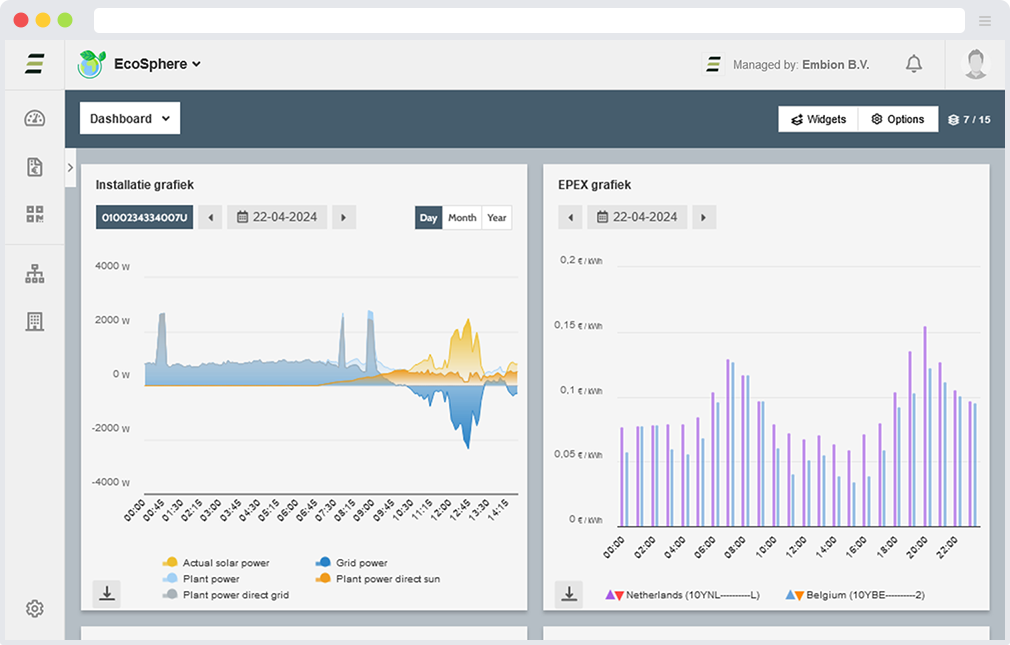
Dashboard templates
Enterprises can create dashboard templates, making it easier to configure dashboards across all linked namespaces.
When a new namespace is created or linked to the enterprise, users within the namespace can select from these pre-configured dashboard templates when creating a new dashboard.
This feature reduces the time and effort needed to set up new dashboards.
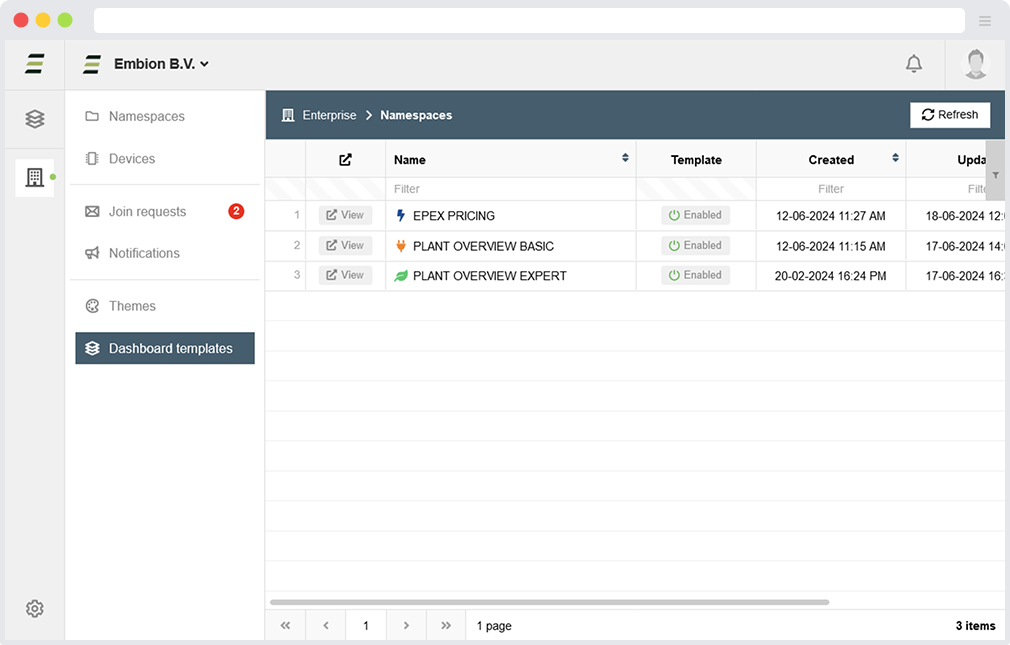
Within the enterprise application a template plugin is added where enterprise users can manage their templates. In this overview the following options can be found:
- View templates - This will open the dashboard application where the templates can be made
- Enable or disable templates - This will enable or disable the ability for linked namespaces to select the template
- Delete templates - This will remove the dashboard template (and dashboard itself within the dashboard application)
Create dashboard template
Templates can be created by opening the ‘Dashboard templates’ application within the enterprise namespace. When creating a new dashboard, there is an option to enable the dashboard as a template.
All available widgets can be used to create the template. The configuration settings of the widgets will also be saved within the template, allowing enterprise users to pre-define widget configurations based on the template.
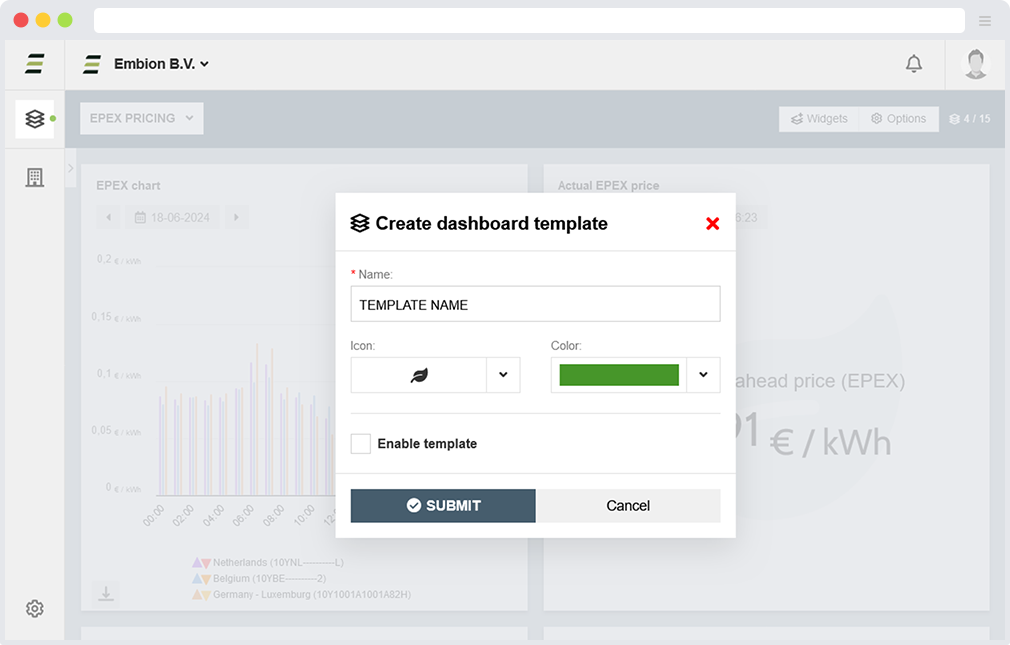
Enterprise users can create new dashboard templates and enable them later. This allows them to set up and configure the dashboard before making it available to users in the linked namespaces.
Widget feautures
Enterprises can use additional configuration settings in widgets while creating dashboard templates. Currently, only the Plant Overview widget contains these extra settings, but more widgets will include them in future updates.
Plant overview
Namespace image instead of icon
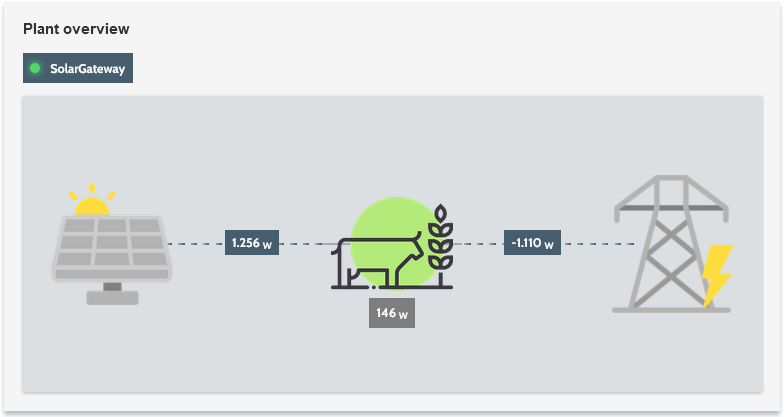
In additional of the default icons, Enterprise users can enable the option to display the uploaded namespace image as icon within the Plant Overview widget.
Select dashboard template
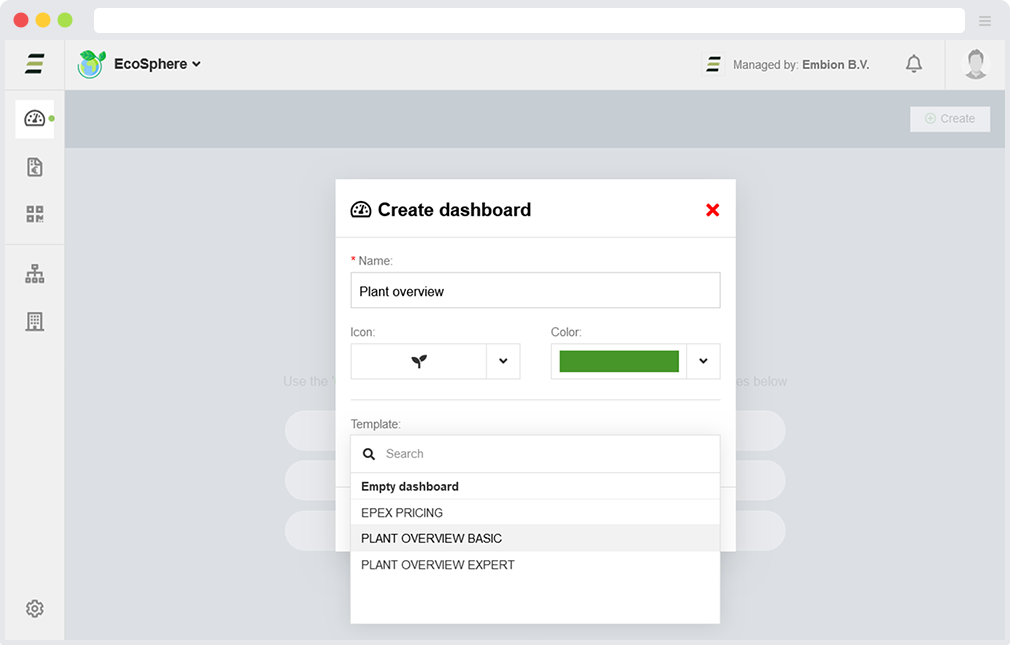
Dashboard templates can be selected and used within all linked namespaces. When a user in a linked namespace opens the dashboard application and no dashboards are created yet, a list of available templates is displayed. Users can press on a template to create a dashboard based on it.
When a dashboard template is selected, all configuration settings of the widgets are copied from the template. If a namespace has only one device connected, the device will automatically be selected in the configuration for the widgets that need a device configuration. Otherwise, the user has to open the configuration settings and select one of the connected devices.
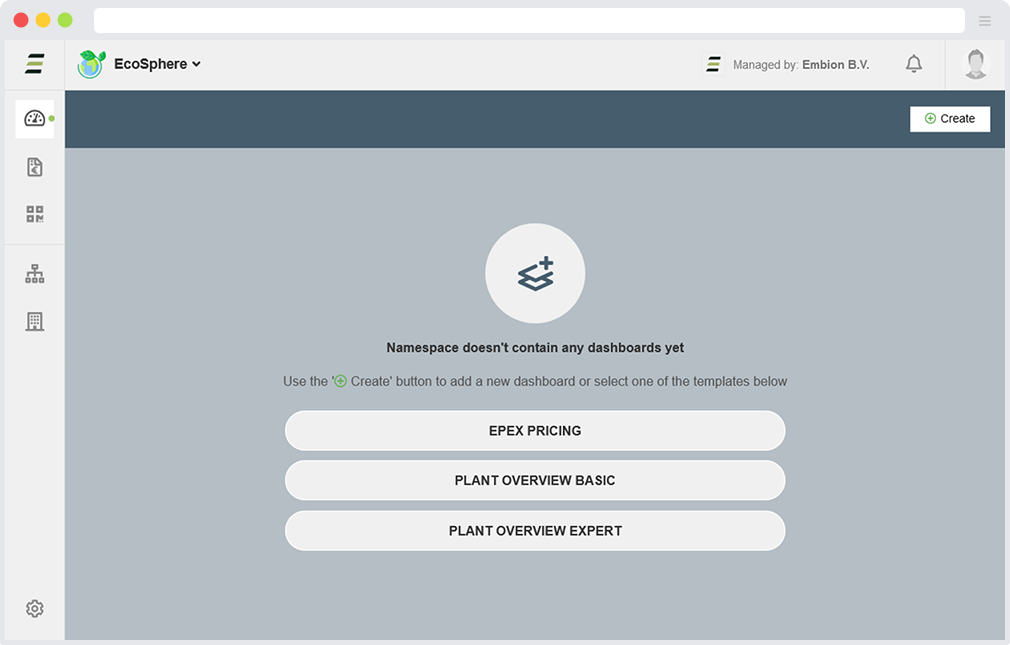
If a namespace has only one device connected, the device will automatically be selected in the configuration for the widgets that need a device configuration. Otherwise, the user has to open the configuration settings on first usage and select one of the connected devices.
Additionally, users can open the create dashboard form and select one of the templates if desired. If no template is selected, an empty dashboard is created.
Enterprise user management
Users
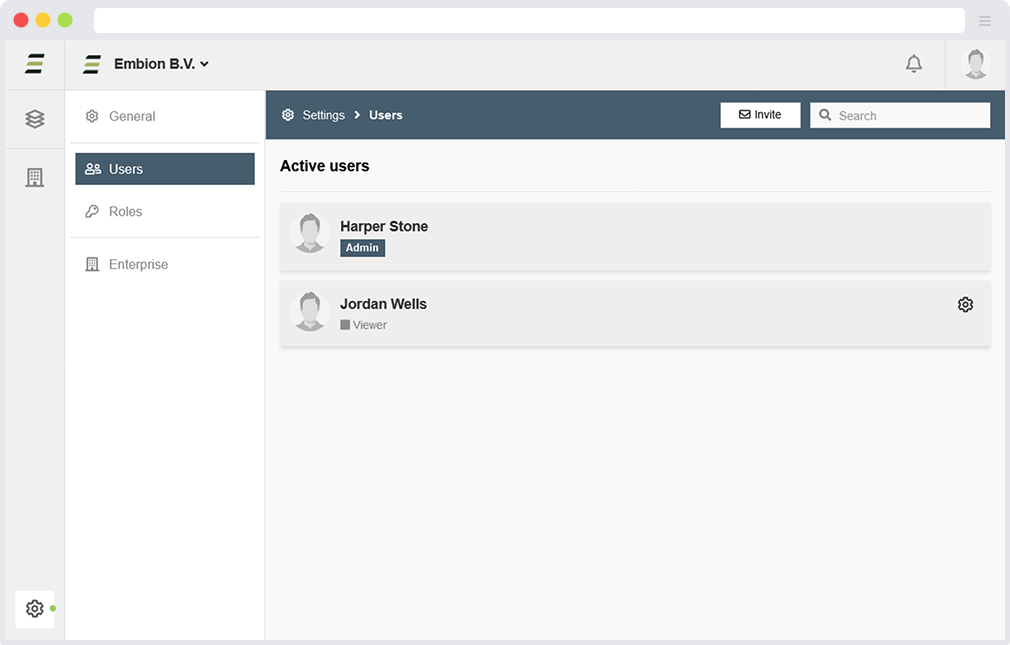
The users page shows all active and pending users within the enterprise, new or existing users of the HUB can be added by pressing the invite button. By pressing the user, roles can be applied.
When enterprise users visit a connected namespace, their role within the enterprise determines their role within the namespace.
By pressing the settings icon the user can be made admin or can be removed.
Roles
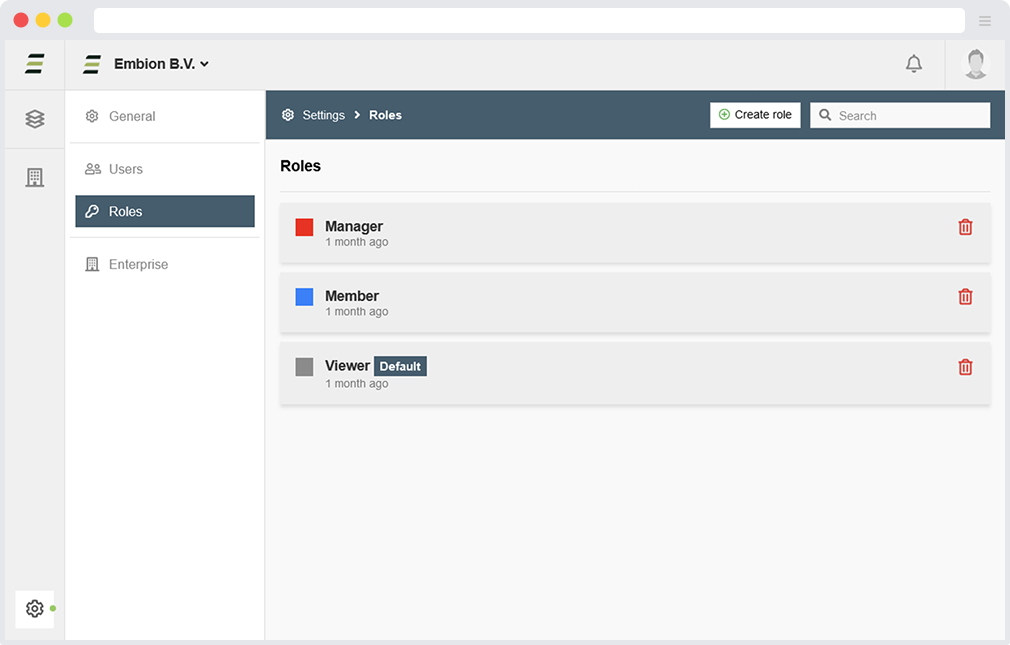
In each enterprise, custom roles can be assigned to users. By default, certain roles are available, but they can be modified as per the requirements. If needed, new custom roles can be created.
When enterprise users visit a connected namespace, their role within the enterprise determines their role within the namespace.
Connected enterprise
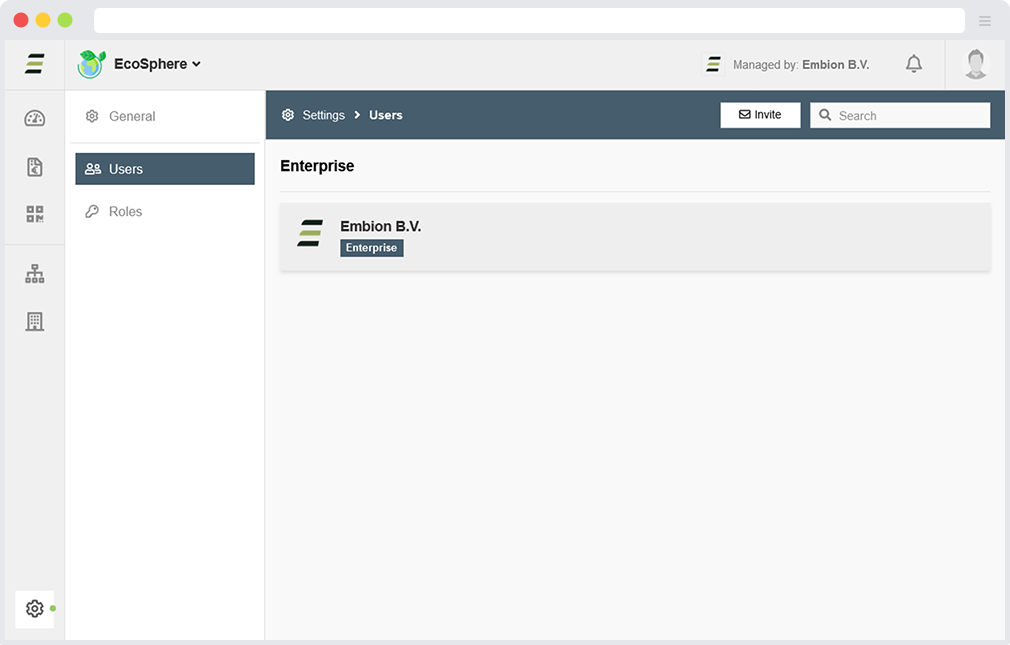
When a namespace is connected to an enterprise, the enterprise will be displayed in the user overview within that namespace.